Wet rooms are now established in the UK as one of the most desirable alternatives to the traditional bathroom as they offer a modern stylish solution for any space MP have brought together all the elements you need to allow the creation of a simple cost-effective wet room we’ve addressed the three key areas that need consideration for your wet room to function correctly gradient drainage and waterproofing the aqua grade wet floor former is our latest innovation it has been designed to create accurate Falls in a wet concrete screed quickly and efficiently and with consistent results the following video explains how to install the aqua grade wet floor system onto a subfloor and apply the screed in order to work efficiently make sure your working area is clean and tidy before you begin the installation using the sheet provided in the product pack check that you have all the components required to build the aqua grade the sheet can also be used to identify how to assemble the matrix make sure that you also have all the components for the top of the gulley tiling frame 10 millimetre spacer ring floor drain base component and membrane clamping ring height adjuster ring stainless steel gulley cover remove the membrane clamping ring from the floor drain base component place it to one side as you will require it later for clamping the tanking membrane into position if you forget to remove the clamp before the membrane has been applied you will find it impossible to resolve the problem without damaging the membrane the 10 millimetre spacer is only required if the floor tiles are 16 to 26 millimetres thick firmly press the tiling frame in to the top of the height adjuster ring you the Aqua grade can be installed either before or after the rest of the floor is screed it however we strongly recommend that the aqua grade is screed separately and not as a single task when the adjoining floor is laid here we are installing the aqua grade before the surrounding floor is poured and shutters have been used to retain the screed in the aqua grade until it has fully set the shutters are set to the final depth of the top floor screed and must be removed before the top screed is poured begin by fitting the for supporting feet and mounting plates to the 600 by 600 yellow section of the aqua grade and then place the yellow section into the required position marking the location of the central circle and mounting plates using a suitable marker the central circle will be the location of the drainage point of the wet room shower floor drill and fit expansion plugs into the subfloor at the location of each of the mounting plates next chase out the subfloor to allow for the fitting of the waste trap and drainage pipe work obviously these requirements may vary from job to job particularly if the Lance is for drainage in a new built project have already been made MP offer a wide variety of different floor drain options the appropriate drain needs to be selected at the time of purchase for the purpose of this installation we are using the standard horizontal trap provided with each aqua grade check that you have all the components for the waist strap optional 52 40 millimetre reducer waist trap with dip tube and one and a half inch threaded waist fitting and tightening tool prior to connecting the waist strap remove the dip tube and unscrew the waist fitting to install the gulley correctly the waste pipe of the trap needs to be accurately positioned in order to align with the central aperture in the aqua grade once the trap and pipe work have been installed secure the foot mounting plates to the subfloor using the screws provided ensure the section is level on all four sides by adjusting each supporting foot individually using a screwdriver and spirit level the accuracy of the installation and drainage performance is critically affected by the accuracy of these levels be sure to set the height of the yellow section in order that the outer edges of the completed matrix will finish at the same height as the surrounding floor screed you when the yellow section is fixed drill out the floor drain based component using a 50 millimetre hole saw and place it into position in the centre of the yellow section remember to remove any burrs after drilling ensure that the trap aligns properly with the hole drilled in the base component insert the 1.
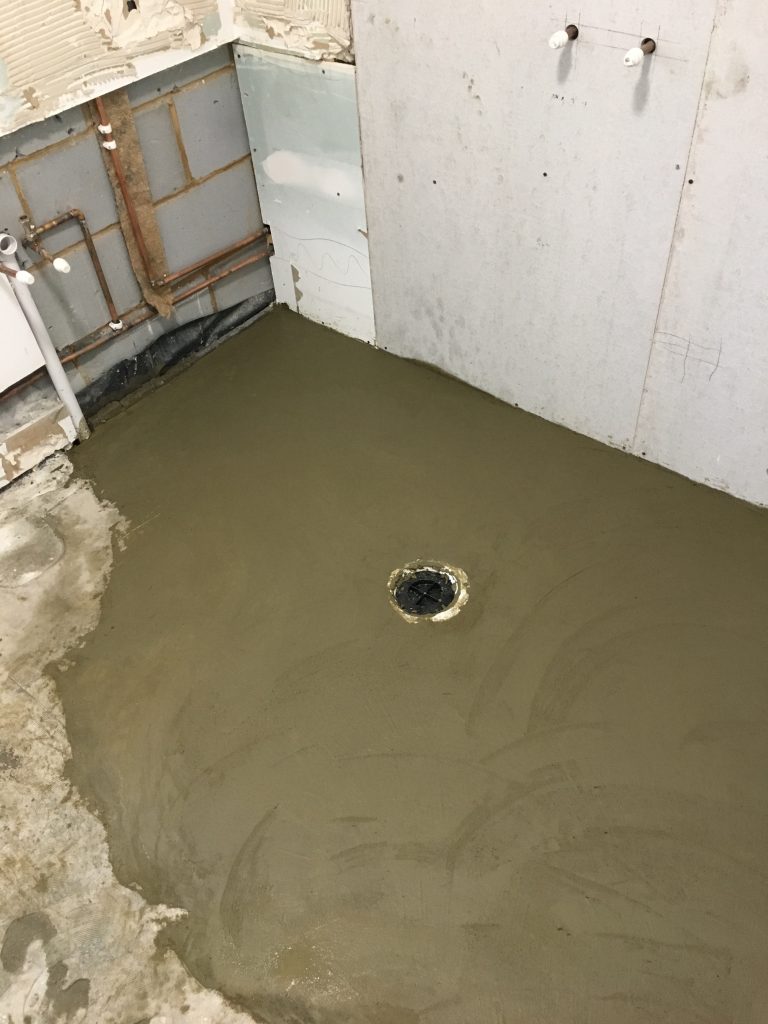
5 inch threaded waste fitting into the previously drilled 50 millimetre hole fix into position using the screws provided leave the tightening tool in position to prevent mortar contaminating the trap during screeding next fit supporting feet to each of the remaining color sections and progressively click them into position to complete the aqua grade matrix ensure the sections are fully interlocked you must build one row at a time starting at the wall and working in a clockwise direction simply snap off any lugs that are not required if the yellow section has been correctly installed and is level on all four sides then the additional sections should also now be level along their edges again using a screwdriver adjust the supporting feet on the outer row so that they just contact the subfloor allowing the outer edge to finish at the same height as the surrounding floor screed apply additional spaces where necessary once the outer row has been set you can then adjust the supporting feet on the inner rows so that they just contact the subfloor this is simply to support the matrix while the wet screed is being applied when the feet have been adjusted check once more using a spirit level that all four sides are level you can now apply the wet screed mix simply fill the aqua grade matrix using a fairly wet mix this will make it easier to spread the screed around to fill the matrix we recommend a mix with rapid setting cement for parts shops and and one part rapid cement ensure the mix is well packed into the aqua grade matrix and that there are no voids left underneath take a ward or plastic float and with circular motions smooth over the surface of the screed using the aqua grade as a guide until the top edges of the matrix are just revealed if the mix is too wet it may be difficult to achieve a good finish if this is the case we recommend that the screed is allowed to cure for a while until it is more workable ensure that the surface is smooth to a good polished finish before allowing to set once dry the shutters can be removed and the surrounding floor poured to the same height as the edges of the aqua grade wet floor area allow the screeds to cure in line with building regulation guidelines before applying any load or waterproofing
Apollo Design Bathroom and Wet Room Specialists Call - 0800 0748405
Apollo Design Bathroom and Wet Room Specialists Call - 0800 0748405